Creating a Coloring Sheet: The Gnome Ranger
author: JENNEVIEVE SCHLEMMER

Making a coloring sheet seems like it should be pretty simple, right? Just draw out an image, scan it, and there you have it! Well, I guess you could do it that way but I'm here to show you how I make my coloring sheets from start to finish. I am playing a Gnome ranger in a game this weekend, so I thought it would be fun to draw her first.
Many people are surprised to find out it took an average of eight hours from conception to finished drawing for each image in my coloring book. A drawing may go through a dozen sketches and several full sized cartoons before I start the final drawing. As you can see below, for quite a few early sketches, I thought I might style my gnome ranger after the rebels' clothing on Endor. That didn't last long. (Her mullet, however, was there from the beginning.) Make sure you aren't violating anyone's copyright when you are drawing your images--it is not legal (or ethical, honestly) to trace or outright copy another artist's drawings or photographs!

I start by scanning with an inexpensive canon scanner and then I use Adobe Photoshop and Illustrator to clean up my drawings. I use a HUION drawing tablet for adjustments to my drawing and for coloring, which will be a different tutorial. Note: I do not draw raw drawings with my tablet. I start with a rough sketch with a good old non-photo blue pencil and then use a mechanical pencil to finish the drawing on smooth Strathmore Bristol Board. Very low tech. Some artist prefer drawing pencils but I like the fine line I can get with a mechanical pencil.
I made this next image a little more yellow so that you can see the non-photo blue rough outline that I drew over with the mechanical pencil. When I am satisfied with the pencil, then I ink in the image using my favorite Micron pens. I use sizes 005 and 01 the most. A lot of comic artists will use pen and ink with a nib or brush but for making coloring sheets, I've found the Micron pens to be the sharpest.

When the drawing is inked and the pencil lines erased to the best of my ability, I scan the image and then open it in Photoshop. Note: I do the bulk of my clean up work in Photoshop and just one tiny detail in Illustrator. Some artists work primarily in Illustrator. There are as many ways of doing things as there are artists doing them!
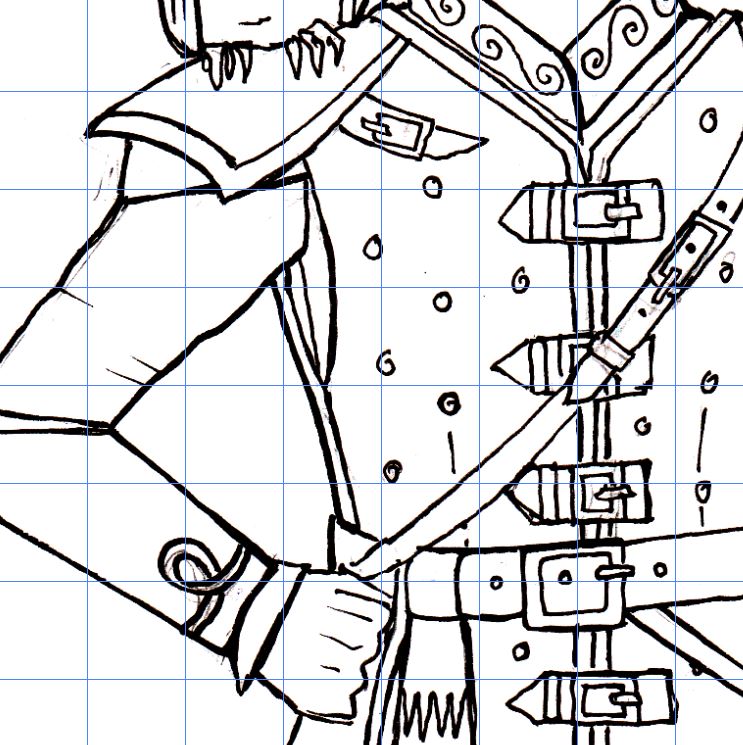
I prefer to work with a grid over my drawings so that I can easily work across each area in a methodical manner without losing my place. The grid is found under VIEW > EXTRAS (CTRL+H) and you can adjust the grid scale under EDIT > PREFERENCES > GRIDS.

This drawing looks good shrunken down, but when you zoom into the raw drawing, you see what a mess the drawing actually is. I try to erase all my pencil lines, but it is hard with a mechanical pencil. At this level of zoom, you can see where the pencil didn't get erased and where the studs on the armor look more like squiggles than actual studs! I would love to pretend I am an effortless artist and all my drawings are perfect from the start, but here you go, my warts and all.
Slowly, methodically, I use my tablet pen to go through every square pixel of the drawing and erase pencil and clean up messy marks. The Illustrator clean up works to do a lot of this too, but I like to control it myself. This erasing and redrawing takes the bulk of my time. Now, if you want, you can stop here and resize your image to make a PDF but the real creme de la creme is to convert your image to a VECTOR graphic, which creates smooth, camera ready lines. This is what we do in Illustrator.
Once she is pretty cleaned up, I make sure the image is the size I want, I save the file in PSD and then open it in Illustrator. This next part is pretty simple and simply magic. I SELECT ALL (CTRL+A) and under OBJECT, I select IMAGE TRACE > MAKE and ta-da! The lines get cleaned up, smoothed out. A new gnome! You can play with the thickness of the lines in Image Trace if you want. (As a bonus action, if I know I want to color the image in with layers on Photoshop, while the image is still selected and while IMAGE TRACE is still "on", I go ahead and select IGNORE WHITE in Image Trace. Again, this is not necessary for a coloring sheet but it is the first step when I want to color something in.)
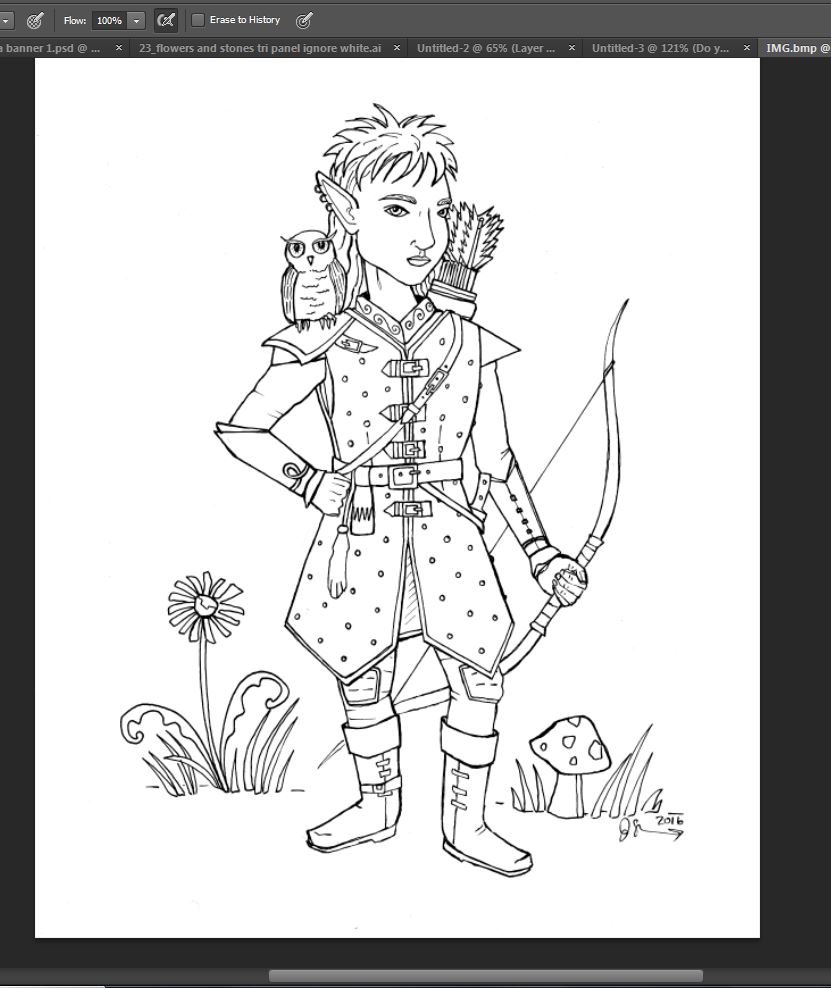
Now, at this point you can save your file as a PDF and then make a smaller PNG as a thumbnail if need be and you are ready to rock! This is what I do with my coloring books. But if I am going to be making coloring sheets to hand out or want to color the image in on the computer, I will save it in Illustrator and then open in back up in Photoshop.
IMPORTANT NOTE: Make sure when you open the image back up in Photoshop, you select 900 pixels per inch or you will lose all the pretty lines you just smoothed out.
Look how clean these lines are now! This is when I like to tweak the image even more. I zoom in and with my tablet pen, thicken lines that got lost in translation (like that buckle strap). I have a tendency to overwork the heck out of lines. When you are zoomed in, of course you see every little wiggle! So be easy on yourself. If you are using Illustrator, your drawings are going to have a nice clean glow about them. (Another note: the checkerboard means that the images is transparent except for the black lines--that is what happens when you select IGNORE WHITE while in IMAGE TRACE. Now I can color in with different layers, but again, that is a different tutorial!)

Cleaned up buckle!

I usually add a copyright mark before saving the final coloring page. Instead of printing them out on my computer, I will order copies from FedEx online and then pick them up at my local shop. It's a handy and inexpensive way to get your coloring sheets to the masses!

Echo Sparkstone, Gnome Ranger, ready for adventures!
Have fun on all your coloring page adventures and feel free to contact me if you have any questions!